If your recycling situation involves bags stuffed behind the trash can, bottles piling up on the counter, or that moment of panic when you realize you’ve missed pickup day again, you’re not alone. A proper recycling station doesn’t just make you feel better about the planet—it actually makes daily life easier when everything has a designated spot. The right setup depends on your space, your household’s recycling volume, and how much you’re willing to spend on something that, let’s be honest, needs to look decent since it’ll be visible every single day.
Figure Out Your Space and Volume First
Before you buy anything, spend a week paying attention to how much recycling you actually generate. A couple that cooks at home will have different needs than a family of five. Your space will dictate your options too—a galley kitchen calls for a very different solution than a mudroom or garage setup.
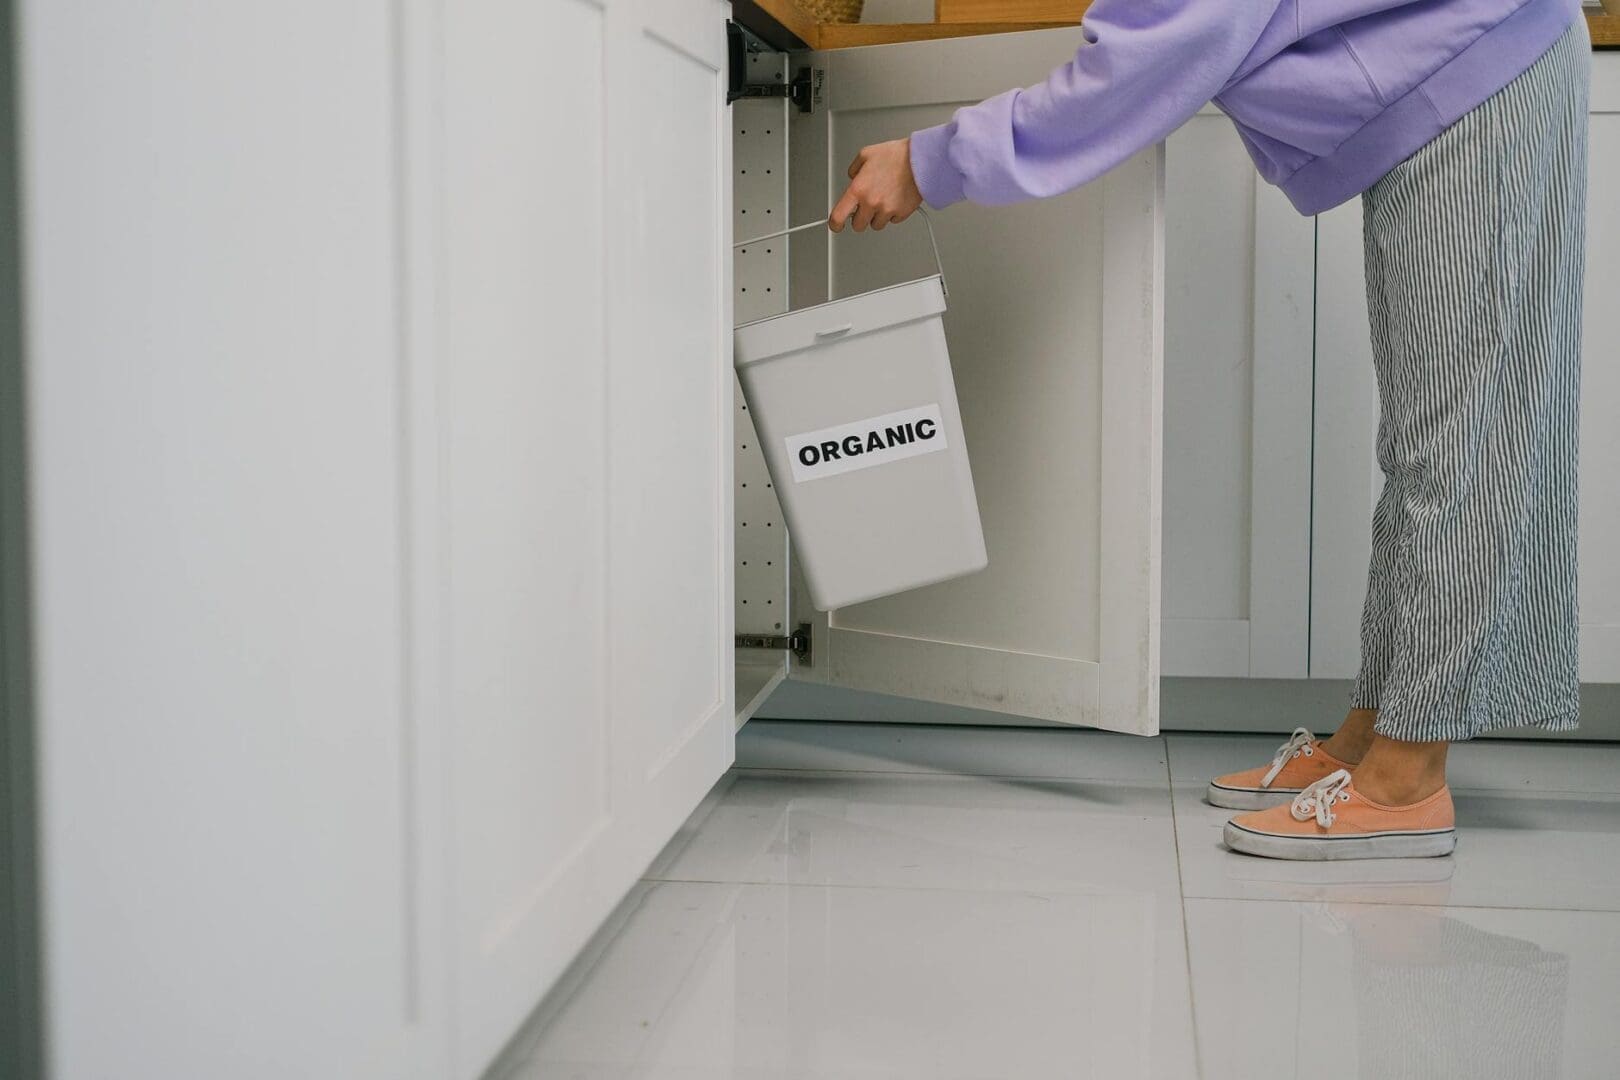
For tight kitchens, look at slim pull-out cabinets or under-sink organizers with multiple compartments. These typically run $50-$150 and keep everything hidden. If you have a pantry, laundry room, or garage access, you can go with larger freestanding stations. Three-bin sorters on casters work well here and cost anywhere from $80-$200 depending on capacity and materials.
Measure your available space carefully, and don’t forget to account for lid clearance if you’re tucking bins under counters or shelves. Nothing’s more frustrating than buying the perfect system only to realize the lids won’t open all the way.
Choose Containers That Match Your Workflow
The best recycling station is one you’ll actually use consistently. Think about how you move through your space and what feels natural. Do you want to sort as you go, or are you fine with a single collection point that you sort later?
Multi-compartment bins with color-coded lids make sorting automatic—blue for paper, green for glass, gray for plastic. These range from budget-friendly plastic options around $40 to sleeker stainless steel versions at $150-$300. Look for bags or removable bins inside that you can lift out when full, rather than having to tip and dump.
If you’re short on floor space, wall-mounted bag holders or hanging bin systems work surprisingly well. Expect to spend $30-$80 for decent ones. Some people prefer matching slim trash cans lined up in a row, which gives you flexibility to rearrange and looks more intentional than a random assortment. A set of three matching 10-13 gallon bins typically costs $60-$120.
Pick Materials That Will Last and Clean Easily
Recycling stations deal with sticky cans, leaky containers, and general messiness. Skip anything with fabric sides or complex crevices that will trap grime. Plastic is affordable and lightweight, but cheaper versions can crack or stain. Mid-range plastic bins with thicker walls hold up much better and are worth the extra $20-$40.
Stainless steel looks sharp and wipes clean instantly, but you’ll pay more—usually $100-$300 for a proper multi-bin station. Powder-coated metal splits the difference, offering durability and easy cleaning at $70-$180. Whatever material you choose, look for smooth interiors, removable liners, and designs without hard-to-reach corners.
If you’re placing your station in a garage or basement, make sure the materials can handle temperature changes and humidity. Some plastics become brittle in cold weather, and untreated wood or particle board won’t fare well in damp conditions.
Make It Work With Your Home’s Style
A recycling station that clashes with your space will annoy you daily. If your kitchen leans modern, look for clean-lined bins in stainless or matte black. Traditional spaces do better with wood enclosures or bins in neutral tones. There are now attractive options with bamboo frames, woven rattan exteriors, and cabinet-style enclosures that hide everything behind doors.
For visible setups, matching your existing trash can style creates a cohesive look. Many manufacturers now offer recycling bins designed to coordinate with their trash can lines. Labels are your friend—even simple vinyl letters or chalkboard tags prevent the “which bin?” dance and help guests sort correctly.
A well-planned recycling station transforms a household chore into something that just flows. Take your measurements, think about your daily patterns, and choose something that balances function with the reality of your space. You’ll be lifting those bins and wiping those surfaces for years, so getting it right from the start makes all the difference.
There’s nothing quite like settling in for movie night at home, but harsh overhead lighting can ruin the whole experience. Too bright, and you’re squinting at a washed-out screen. Too dark, and you’re fumbling for the remote or straining your eyes. Getting your living room lighting right for movie watching isn’t complicated—it just takes the […]
You probably reach for your phone to change the temperature, lock your doors, or check who’s at the front door—so why are you still walking across the room to flip light switches? Smart lighting transforms your living room from a space with basic on-off switches into one that adapts to movie nights, dinner parties, reading […]
A chandelier can transform your living room from ordinary to unforgettable, but choosing the wrong size or style can throw off your entire space. Unlike task lighting that quietly does its job, a chandelier makes a statement—which means getting it right matters. Whether you’re working with vaulted ceilings or a cozy 10×12 room, here’s how […]